Zsh: The Ultimate Shell for Power Users

As a computer science enthusiast, I enjoy writing about a wide range of topics, from the latest programming languages to the impact of technology on society.
Zsh, short for Z Shell, is an advanced shell and command-line interpreter for Unix-like operating systems. It is an extended version of the Bourne shell (sh) with additional features and improvements.
It is popular for its features like Auto-completion, Plugin, and Theme Support and is easily customizable.
Setting Zsh on Ubuntu Machine
1. Check your current shell:
echo $SHELL
Output:

2. Update your system.
sudo apt update
3. Install zsh.
sudo apt install -y zsh
4. Change the current shell to zsh.
chsh -s /bin/zsh
5. Now logout of your device and log back in again so you can see your shell changed.
6. Execute: gnome-session-quit to log out or just log out via GUI.
7. Log back in, open the terminal and you will see.
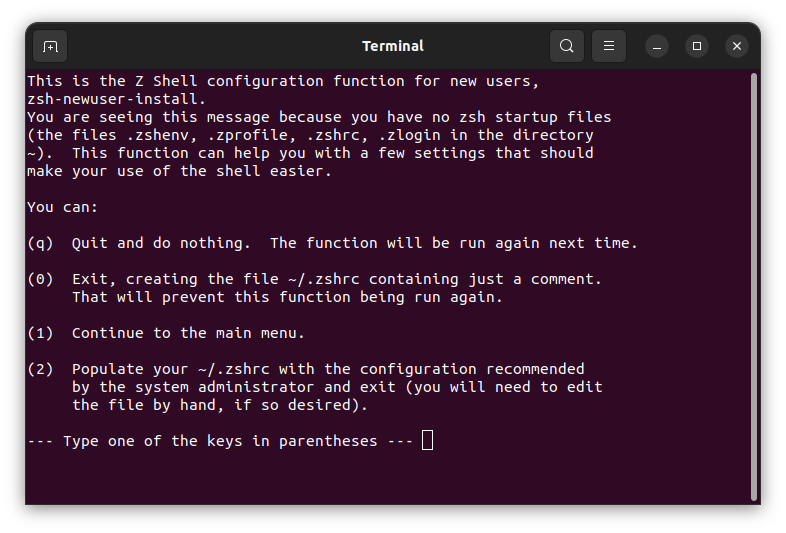
8. Press 0:

9. Install oh my zsh now.
Go to this link https://github.com/ohmyzsh/ohmyzsh#getting-started
OR
Make sure you have git installed and then execute:
sh -c "$(wget -O- https://raw.githubusercontent.com/ohmyzsh/ohmyzsh/master/tools/install.sh)"
10. After installing oh my zsh you will see output like this:

11. Now we have installed oh my zsh and we can install and add plugins to zsh.
12. We will add plugins into our .zshrc file which looks like this:
You can open it on any text editor, like gedit ~/.zshrc or nano ~/.zshrc we will edit this file later.

13. Now let's add auto-suggestion plugin into our zsh.
You can follow this to install and add auto-suggestion plugin:
https://github.com/zsh-users/zsh-autosuggestions/blob/master/INSTALL.md#oh-my-zsh
OR
Execute this:
git clone https://github.com/zsh-users/zsh-autosuggestions ${ZSH_CUSTOM:-~/.oh-my-zsh/custom}/plugins/zsh-autosuggestions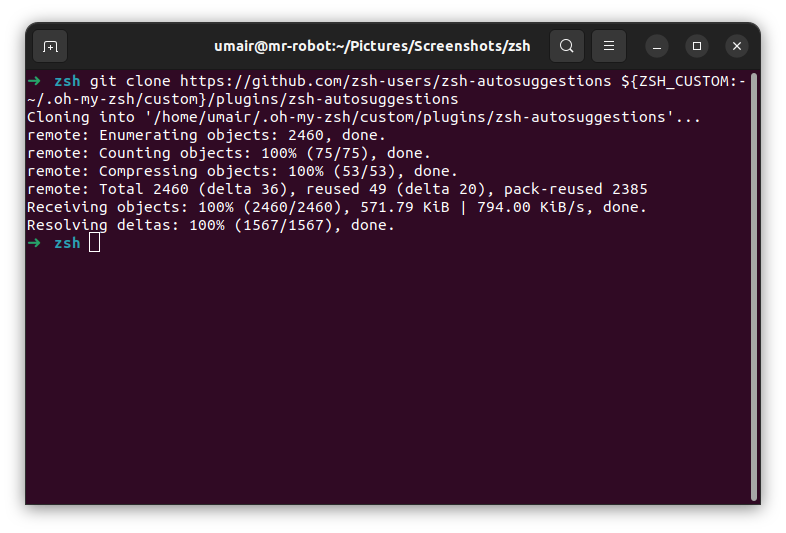
and add this
zsh-autosuggestionsto your.zshrcfile in the plugin variable.To do that open .zshrc using:
sudo open ~/.zshrcon line 73 (line number can be different for you) add
zsh-autosuggestions.
14. Save this file and then close the terminal.
Open the terminal again and when you type a command you will see auto-suggestions like this:

15. Now we will add another plugin which is syntax highlighting.
You can go to this URL to setup it.
https://github.com/zsh-users/zsh-syntax-highlighting/blob/master/INSTALL.md#oh-my-zshOR
Execute this:
git clone https://github.com/zsh-users/zsh-syntax-highlighting.git ${ZSH_CUSTOM:-~/.oh-my-zsh/custom}/plugins/zsh-syntax-highlighting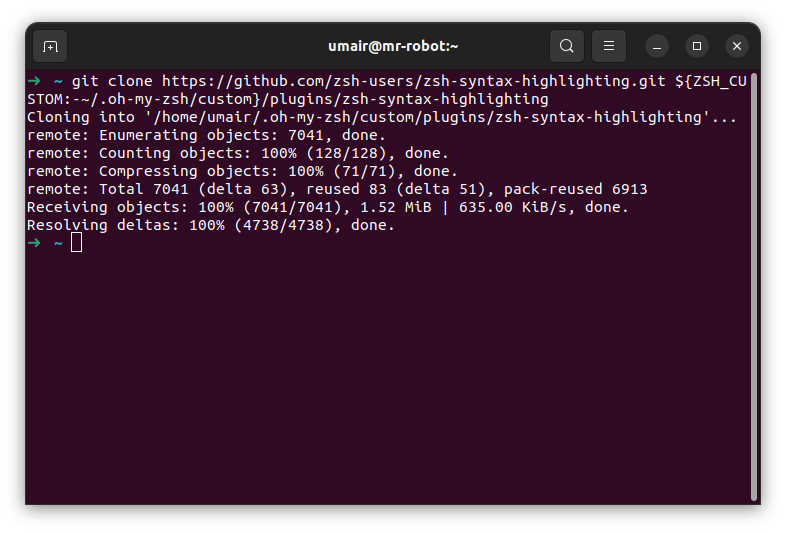
and after that like auto-suggestions plugin add this one to .zshrc as well.
sudo open ~/.zshrcAdd
zsh-syntax-highlightingin the plugin section.After adding it your plugin section should look like this:

16. Save your .zshrc file.
17. Close Terminal.
18. Open it again and now you will see syntax highlighting + auto-suggestion on.
See this:

You can make this more amazing but adding a theme like powerlevel10k.
--> I will write about it as well and will add its link to this article.
- If you have any problem following this, please feel free to ask anything.


